Feedback
is the bane of any audio engineer's existence. So learning how to smite
it is a must for live sound. If feedback always seems to creep up on
you, read on to be rid of it once and for all!
Contending with Feedback
It
has been said the best compliment an audio engineer can receive after a
show is no comment at all. Rarely does an audience or band critically
pay attention to the sound itself. It's all about the music or keynote
speaker. But when feedback shows up, boy does everyone take notice!
We
need to be at the ready to fix feedback at a moments notice during the
show. However, preventing it in the first place is always a better
approach! One of the easiest and most efficient ways to do this is by
peaking or ringing out the room.
What Does It Mean to "Peak" a Room?
The
idea behind peaking a room is simple. Bring up the microphone gain
until feedback occurs, and then knock down the problem frequencies. By
doing this, you hit the peak amplitude allowable for the room. Think of
it as finding your limitations.
Sometimes we are able to get our
gain really high before the room even begins to ring. Other times it
might feed back at even the slightest hint of gain. No matter how many
times you may peak out the same room, remember that things change so
always start from square one each time.
Prepping to Peak
Before
we go about actually peaking a room, we need to set ourselves up so we
don't peak at the wrong reference level. We also need to account for
where in the room the microphones will or could end up being. Never
leave anything to chance!
Gain Staging
One
of the biggest problems with peaking is the gain staging of the setup.
If the monitor amplifiers are way too hot, then it will seem like you
are feeding back really easily. On the flip side, if the amps are way
too soft, then it might lull you into a false sense of security.
Here is a safe procedure to get you started:
Make sure your speakers are turned all the way down.
Place either pink noise, or a test tone (most likely 1kHz) on a track.
Bring
up the gain until you see a solid level on your mixer just like you
would for a mic. Somewhere between 12 and 3 o'clock is a safe range.
Next,
raise both the track and master faders (or AUX/submix in the case of
monitor mixes) to unity. Remember you should not hear anything yet.
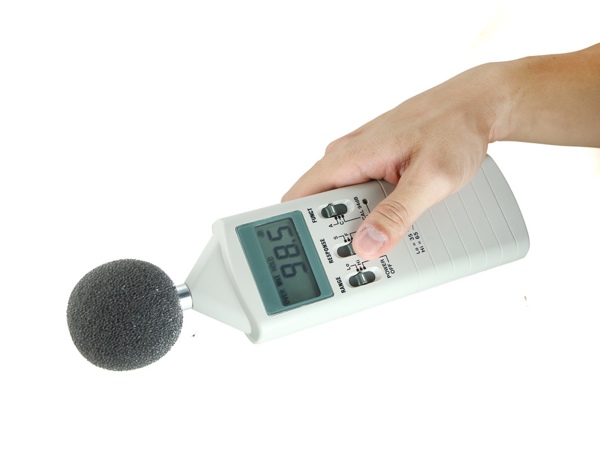
Now,
slowly bring the gain up on the speakers until you reach your desired
RMS amplitude. Use a sound pressure meter from a reasonable distance to
measure the RMS during this process.
You should now have an even gain stage throughout the whole system.
The
trick here is determining what your RMS should be. Obviously a rock
band is going to be much louder than a presenter at a conference. I
recommend giving yourself just a little extra headroom, as inevitably
people always want things louder, and louder means more chance of
feedback!
Worst Case Scenario
Live
sound engineers traditionally use cardioid or hyper-cardioid microphones
on stage. There are of course cases for hemispherical and omni, but
they are rare. Why? Because a directional mic like a cardioid rejects
sound better from behind. This,
of course, is paramount when trying to tame feedback. Since the stage
monitors are going to be aimed right at the musicians (and subsequently
their microphone) we want to prevent as much sound getting to that mic
as possible. Except for when we are about to do this...
Turn
down any track faders and gain you may have up on your mixer. Also turn
down any AUXs you are using if you are trying to ring out your monitor
wedges.
Make sure your master fader/AUX and speakers are left untouched from the gain staging you just performed
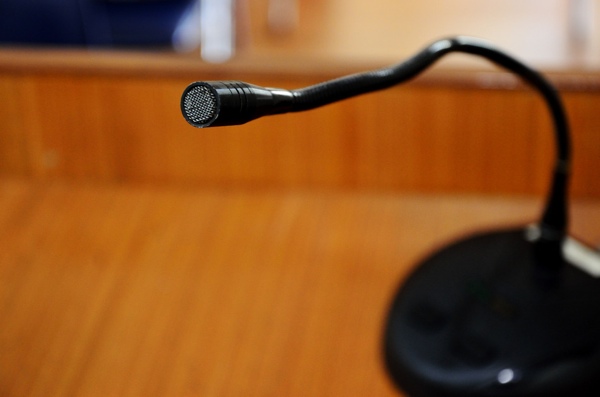
Plug
in a microphone on stage and place it roughly at head level as if a
vocalist was singing. If you have a podium for a speaker, place the
microphone there.
Turn this microphone around and aim it right into the monitor wedges or out into the audience
While
this might sound like sonic suicide, remember that the microphone
currently has no gain. By setting up our microphone to face into the
sound source, we can account for the worst case scenario. You could of
course put the microphone literally right on the speaker, but this is
highly unrealistic and going to cause more problems than benefits.
Peaking Out
With
the gain staging set and the microphone in a worst case scenario
position, we can finally peak out our room. To do so, you are going to
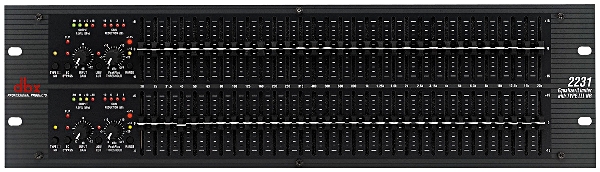
need to ride the fader very gently and use a 31-band graphic EQ. Why a
graphic EQ with so many bands? Because we need to notch out very
specific frequency ranges so we can leave as much signal unaffected as
possible. DBX 2231 31-Band EQ
Begin by deciding whether you are ringing out the main monitors or the stage monitors first.
Grab
the corresponding fader or AUX potentiometer for the mains or stage
monitors. This will be your primary gain riding control.
With
your fader or AUX all the way down, bring your microphone gain up to
roughly 2 o'clock. If you know your vocalist/instrument is very soft
bring it up even higher.
Very slowlybring up the tracks fader or AUX until you start to hear a little bit of feedback sneak in.
Once you hear the feedback bring your fader/AUX down just below where you started to hear the feedback until it disappears.
Go to your graphic EQ and once again very slowlybring the gain up and back down on each individual band. This will show you which frequencies are feeding back.
Once you find a frequency that feeds back, bring that frequency down on the EQ.
If
you barely touched a particular band before it fed back, then you will
need to bring down that band quite a bit. However, if you had to raise
that particular band a lot to make it feedback, then you only need to
turn it down a little.
With your feedback now suppressed, very slowly bring up your fader/AUX once again.
If you encounter feedback again, repeat the same process above until your fader/AUX reaches unity (0dB) or even a little above.
If
you do all of the above and still find you can't reach unity, you might
have reached your system's limitations. Remember, as we turn up our
systems gain, the more and more gain reduction we will need in our EQ.
Occasionally,
a particular microphone in a certain place may feedback so easily that
even -15dB of gain reduction is still not enough for how loud the venue
needs to be. Bar bands are notorious for this.
If this should arise, you have the following options:
Accept the lower overall volume, and turn down your monitors so the fader/AUX can reach unity.
Tell the band or venue owner that the system cannot go louder, and should be turned down. (Good luck!)
Daisy chain two 31-band EQs together.
While
the last option sounds ideal, you may not always have access to
additional spare graphic EQs. This setup also induces more noise and
phase smearing. Lastly, if a venue needs to be that loud, then you might
be violating noise laws and should not be that loud anyway!
Conclusion
Phew!
As you can see, peaking out a room can be a time-consuming task. While
it might sound like a lot of steps, it really isn't once you try it
yourself and understand the procedure. As you peak out rooms more and
more, you will get better at finding problem frequencies by ear, and
will not need to check every EQ band every time.
The trick is to
be gentle with the feedback, and not haphazardly raise and lower gain
all over the place. Just because a band is feeding back does not mean
you need to drop it by 15dB immediately. If you had to raise that band by 15dB to make it feedback then you probably only need to drop it by 1 or 2dB. If you drop almost all 31-bands by similar amounts then all you did was lower the system's gain!
Also,
be sure to do the same procedure with different mics. If one vocalist
is using a 55SH and the other a OM2, then these microphones will have
very different feedback characteristics. Also, be sure to ring each
monitor and the mains separately.


No comments:
Post a Comment